


How To Remove Swirl Marks From Paint

IN THIS FREE GUIDE:
- Learn what swirl marks are, and how to eradicate them from your paintwork safely, saving you hundreds along the way.
- See the different polishing products involved and how they can be used to enhance your vehicle with professional results.
- Discover how prevention is far better than cure, and how safe maintenance is always a top priority.
See how you can eradicate swirls and enhance your paintwork with our simple guide...
How to effectively remove annoying swirl marks is perhaps the number one question in all of car detailing. But the first thing to remember is that there's two simple, but distinctively different, responses. The first is that you can only remove swirls by polishing your paintwork with the correct detailing products, that's a given. But the second is another question - why have you got swirls in the first place? Both are important to consider on your journey to detailing enlightenment.
The good news though, is no matter how bad these swirls appear to be, they nearly always look far worse than they actually are. Occasional swirl correction using the best polishes and compounds is not only safe, relatively straightforward and will enhance the appearance of your paintwork, but it will actively help your vehicle hold its value, too.
So, with that in mind, here's everything you need to know about eradicating those swirl marks…


Machine Polishing
Polishing and paint correction is often seen as the stage where your car wash becomes a fully-fledged detail. But, whether you’re restoring and refining your paintwork with a machi...


What Are Swirl Marks?
By far the most common of paint defects, swirl marks are masses of fine scratches in the surface of the top layer of your paintwork. Due to the way light bounces off these in a random fashion these often appear as a messy spider web pattern, and they can be particularly noticeable on darker colour, even if they are just as common on lighter paintwork. This kind of light refraction has the effect of amplifying the appearance of these kind of surface defects, so, while they can be relatively light scratches that are simple to remove, they can falsely appear to be extremely heavily damaged areas of paintwork, particularly in direct sunlight. And, you know what they say - appearances are everything, aren't they?
These tiny scratches not only look horrendous in any kind of light, but the ridges in the surface also offer a rough finish that allows dirt, water and corrosive contaminants to stick more readily. With it being easier for grime to gain purchase on these surfaces, it's a rather unwelcome bonus that your paintwork will become contaminated more quickly, making it much harder to wash, and often requiring more frequent decontamination with the heavy hitting "decon wash' products that remove the kind of contaminants that washing alone cannot remove.
Regardless of the type of paint, swirl marks are always limited to the top layer, and most commonly around 2-4 microns deep. The heaviest swirling can be a little deeper of course, but just as long as it doesn't protrude through the top layer into the coat below (taking these light defects into the realm of deep scratches) they can be effectively removed through machine polishing.
This also means that in single stage paintwork - which is often found on pre-1980s cars and essentially a single layer of coloured basecoat over the primer coat - the swirls will be in the top of the colour coat. While in more common two stage paintwork, where the top layer is protective clearcoat (lacquer) over the basecoat and primer (what we call a 3-layer substrate) the swirl marks will be limited to the lacquer layer. These are the only layers that you will be polishing.

What Causes Swirl Marks?
Light scratches and swirl marks are chiefly caused by poor wash techniques and using the wrong, or poor quality, detailing products. The most obvious being when using automated car washes. These utilise large brushes which often hold grit and grime through tackling multiple vehicles and basically whip the defects right into your paintwork. You can never be sure that these are clean to start with because, when you think about it, the majority of people use ACWs when their vehicle is extremely dirty. So it stands to reason that the wash media will pick up some seriously heavy soiling. Worse still, all it takes is the tiniest piece of grit to inflict swirls.
Even hand washing without using safe techniques will inevitably damage paintwork. Dragging contaminants across the surface with a sponge is a sure-fire way to inflict swirls, and so is washing with a single car shampoo bucket where you don't have a separate bucket of fresh water to clean out your wash media after every pass. Even premature contact washing in small circular motions can inflict swirling, and all this is the reason why it's vital to wash correctly, not just before using a car polish, but even more crucially on maintenance washes.
The short of it is that prevention is better than cure, and without mastering the wash stage there's simply no point in polishing your vehicle to remove swirls - after just a couple of washes, you can guarantee they'll be back!

Wash
We’ve always said it; the contact wash stage (or the ‘wet work’) is likely the most important part of car detailing process. This is because it not only lays the foundation for ev...


The Detailer's Safe Wash
So, what's the perfect "safe' wash on paintwork? Well, it's a two-pronged approach of using the correct techniques and car wash products. After all, a best-case scenario is never having swirl marks in the first place and not having to polish at all. Here's a basic rundown...
Step 1: Pre-Wash
First and foremost, always perform a thorough pre-wash. This is performed straight after cleaning the engine bay (if applicable) and the wheels and tyres. The pre-wash simply where you remove the heaviest soiling before touching the car with your wash mitt, significantly cutting down the risk of inflicting swirls.
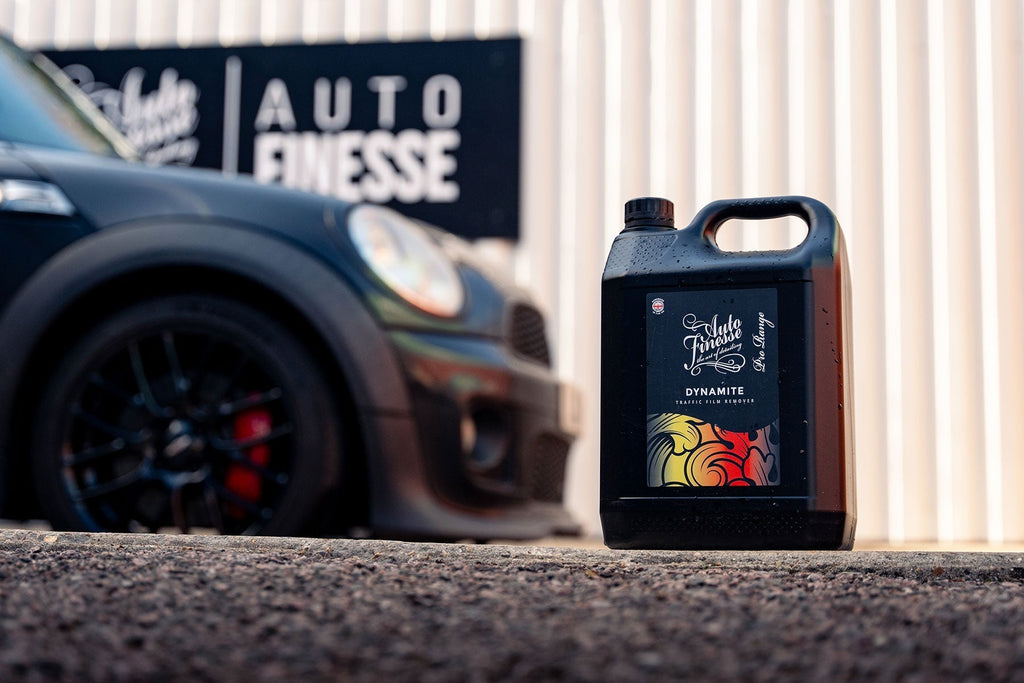
Rinse away as much dirt and grime as possible with your pressure washer (physical contaminant removal) before utilising a suitable pre-wash cleaner, like Citrus Power Bug & Grime Remover or Dynamite Traffic Film Remover to break down and lift stuck on debris and dirt (chemical contaminant removal). Our pre wash cleaners are designed to dissolve and suspend harmful particles in their respective solutions allowing them to be rinsed away without touching the paintwork.

Step 2: Snow Foam
The snow foam stage is still technically part of the pre-wash and is just as important for a swirl-free wash. Avalanche Snow Foam works in a similar way to our pre-wash cleaners, but because it's whipped up into a thick foam, it lingers for the maximum possible dwell time to further break down the most stuck-on soiling. Avalanche also works its way into all the nooks and panel gaps to flush out clean away hidden dust and grime that may be blown out later and interfere with your polishing.
Apply Avalanche over the whole car using a Snow Foam Lance or Foaming Pressure Sprayer and leave to dwell letting the citrus-infused formula break down the bonded grime. When the snow foam starts to dry rinse the car thoroughly.

Step 3: Contact Wash
Obviously safe washing doesn't stop there, and here's where you can get on to the contact wash. Again, when you make physical contact with your paintwork is when it's most at risk, but there are a few things you can do to cut down on the chance of inflicting swirls. The first of course, is using Lather Car Shampoo. This has been formulated as a powerful surface and protection layer-safe cleaner to break down and lift remaining grime, but it's also classed as a lubricant which means it forms a slippery barrier between the contaminants and your paintwork so they don't come in contact when the suds are rinsed away.
Lather is also classed as a pure cleaner, it doesn't contain any waxes, shining agents or ceramic coatings - it's purly used to clean. This is important because we're looking to polish later, so there's no advantage in adding surface protection (that we'll need to polish away anyway) at this stage.


Lather
Lather Car Shampoo is a powerful blend of advanced surfactants and highly-concentrated lubricants, designed to make your contact wash easier - and safer - than... See product details More
Use Two Buckets
It's also important to use two Detailing Buckets, every time you wash. One for your shampoo solution, and one with fresh clean water to rinse out your wash mitt (ridding it of any dirt picked up along the way) each time you need to load up with more car shampoo. This technique is absolutely vital, to cut down on the risk of heavy grime being recirculated back onto your wash mitt. And don't forget that this doesn't include the third bucket - the one you'll use for your wheels and tyres before you even start on your paintwork!


Choose Your Wash Media Wisely
A Wash Mitt or Wash Pad is also a vital tool in the swirl-free wash arsenal, and we've developed a whole range.
Whether they're constructed from lambswool or microfibre, two things they all have in common is that they're soft on surfaces and designed to gently lift particles. They then hold them away from paintwork deep within their fibres, until they're rinsed out. A traditional sponge can't do that and instead simply pushes grime around. Added to the fact that many are too hard and scratchy for paintwork, is why using professional wash media is so important.
One other thing about wash media, along with all car detailing cloths in general - if you drop it, bin it! Picking up grime off of the floor is a common mistake, and it only takes a second to transfer that back onto your paintwork. If yours accidentally hits floor, you can never quite guarantee you can clean it out effectively.

Take The Right Path
First of all washing in straight, sweeping lines rather than circular motions can significantly cut down on swirl marks, but what's even more crucial is that you take the correct path round the vehicle.
Basically, speaking this is where you work on the cleanest parts of the vehicle first, to prevent transfer of grime from dirtier areas to cleaner areas. Usually you'll start on the roof, following with the windscreen, windows, bonnet, upper sides, front bumper, lower sides and… but, of course, use your best judgement.
Once you have washed and rinsed the car down that's the safe wash part complete. In normal circumstances, say if you we're performing safe routine maintenance, you can now dry the car with a suitable drying towel. That's the basics of a detailers safe wash, but for a more in depth article on the science behind the products and the process see our guide: How To Safely Wash A Car.
In that case of course, purely because we're looking to eradicate the swirl marks, we won't dry just yet, instead we'll be performing a full 3-stage paintwork decontamination.

Paintwork Decontamination
The "decon wash' is a 3-stage technique used to remove heavily embedded contaminants. This process uses specialist decontamination products to safely remove the kind of contamination that washing alone cannot. This is performed right before drying as a preparation for your polishing.
The basic decontamination involves using Iron Out Contaminant Remover to eradicate ferrous metal deposits, followed by ObliTARate Tar & Glue Remover for sticky residues, and a Clay Bar along with Glide Clay Lube to physically pull out any other particles, like tree sap, bird dropping residue or overspray.
These steps are always vital to follow before any polishing can take place, simply to prevent moving these contaminants around and inflicting more damage. You can learn more about 3-stage contamination in our full article here - How To Safely Decontaminate Paintwork.


How Are Swirl Marks Safely Removed?
Now you've mastered your washing, it's back to those swirl marks...
Swirling in paintwork can only be removed through surface abrasion using a suitable polish or polishing compound. These types of abrasive detailing products are designed to take away a microscopic layer off the top of the surface to create a perfectly level finish. So, technically at least, you're not physically removing the actual swirl marks at all, you're removing the surface of the paintwork around them, down to the bottom of the deepest swirl mark, until the swirls simply disappear. This also makes light reflect from the surface in a more uniform fashion, making the paintwork appear deeper and shinier. In most cases we'll use a polishing machine to break down the compounds fully... but we'll get to that.
The point is that having enough paintwork to polish is a chief concern, and the reason that professional detailers, who won't know the history of the vehicle, use paint depth gauges to ensure there's enough of a layer to level out without burning through to the one underneath, whether that's primer on single stage paintwork, or colour coat on two stage paintwork.
As a rule of thumb, clearcoat layers are around 70 microns thick, while single stage basecoat will be around 40-50 microns thick. This is of course, before a car has been polished, so, even though you're only taking away a few microns every time you correct your swirl marks, you can see why it's important not to carry out paint correction or polishing every time you wash your car. Correction is an occasional job, a couple of times a year at most - if you polished away a couple of microns every week. It's also another reason why correct maintenance is so important, we only polish a car when we actually need to.

Polishing Machines
Machine polishing is for many the process where a traditional car wash becomes more of a professional style detail. This is also the detailing stage most associated with profession...
Choosing The Right Polish
There are of course a few other variables that need to be considered, and these will directly influence the polishing products you use. Perhaps the most important is the severity of the swirls, as the deepest defects will need more "cut' and hence a coarser compound or car polish to take away more of the top layer to level the surface.
Essentially compounds and polishes are the same thing and have a different level of cut according to the size of the abrasive particles and the larger they are, they more they will score away the surface. Think of it like the difference between using very coarse and very fine sandpaper, only on a microscopic level.
Many loosely refer to a coarser product as a compound and a finer product as a polish, but this is only a very loose term. Technically they're both the same thing, and what needs to be considered is their coarseness - a coarse restoring compound will cut quickly, but need following stages with finer and finer compounds to refine the finish - a bit like the difference between finishing a piece of wood with a fine sandpaper or an angle grinder. Usually extremely coarse compounds are reserved for extreme restoration jobs and even heavier swirl marks can be tackled with medium-fine compounds.

Polishes & Compounds
Polishing and paint correction is, for many observers, the process where a car wash becomes a detail. There’s no doubt that this stage is the one that’s most associated with the ar...
First Consider Your Protection
It's also crucial to consider the type of protection you'll be using after you've cut out those swirls. It goes without saying that you should always safeguard you work and add a protection layer or two, it's simply silly not to. But, what's important here is the type of protection you prefer can affect your choice of car polish. Ceramic coatings for example require pre-correction with a product that doesn't contain any waxes or fillers, because these interfere with the chemical bonding process. If you're using a car wax however, an all-in-one polish that already contains a wax can be used to enhance paintwork remove light swirling, because you're basically applying even more protection. Of course, you can use a correction product with no wax content in all cases. Most correction compounds designed to remove more than light swirling do not contain waxes, but it's always worth checking, especially if you're thinking of applying a ceramic coating.

Wax & Protect
Car Wax, Ceramic coatings, and spray wax. Adding protection, especially after any polishing and correction has taken place, is not only one of the key fundamentals of car detailin...


Hand Or Machine Polishing?
Hand polishing can be effective, especially on small areas with fine abrasives, and it is possible to remove light swirling in this way. But, due to the way a polishing compound and car polish works, machine polishing will usually be the quickest, most consistent and most effective method.
Through heat and physical friction, the abrasive particles in compounds have to be broken down to create a finer and finer finish as you work them through. On a microscopic level these are smashed together, breaking them up into smaller and smaller particles which cut less and less, and start to refine more and more, this is what gives a compound its "range of cut'. This is also the reason it's important to fully work your compound through - usually indicated by the residue turning clear - for it to "finish down' and create the most refined surface.

Machine Polishing
Polishing and paint correction is often seen as the stage where your car wash becomes a fully-fledged detail. But, whether you’re restoring and refining your paintwork with a machi...
Paintwork Polishes And Compounds
As well as our DPX Dual Action Machine Polisher and MPX Dual Action Polisher, along with a host of polishing pads and polishing accessories, we've also developed a full range of compounds and polishes...


Tripple All-in-One Polish
Effective on light swirls, Tripple All-in-One Car Polish contains relatively fine abrasives which are easily broken down to create an extremely refined finish. An amazing product for light enhancement and swirl removal, Tripple also contains carnauba wax, meaning it can clean, polish and protect in one application… hence the name. Tripple has many other uses too, see our article: Push Your Detail To The Next Level With Tripple.


Tripple
Discover the ultimate car polish with Tripple All-In-One Car Polish, designed to deliver outstanding results in record time. This advanced polishing compound is... See product details More

One Step Compound
One Step Compound is a single stage car polish is unlike traditional compounds because of its huge range of cut. Unlike every other compound One Step is capable of starting as a heavy hitting coarse-medium compound but refines down to a fine compound as it's worked through. This means that it's capable of tackling the heaviest swirling and other defects, without the need to change products to a finer compound for refinement. One Step contains no waxes or fillers, giving a true finish that's perfect for a wax or in preparation of application of a ceramic coating. See our article: Getting The Most From One Step.


One Step
The ultimate single-stage car polish for paint correction, One Step All-in-One Compound is a speedy car detailing game-changer that offers the easy way to remov... See product details More

Rejuvenate Paintwork Cleanser
Designed primarily for removing paint oxidation and to make the most of the appearance of hard waxes, Rejuvenate Pre-wax Paintwork Cleanser is also packed with fine abrasives, allowing it to tackle light swirling.
Rejuvenate can be applied by hand or with a machine polisher and contains no waxes or fillers making it great for surface preparation before applying any type of protection layer.


Rejuvenate
Specifically developed to enhance both the beauty and performance of our Signature Waxes, Rejuvenate is an advanced abrasive pre-wax cleaner cleanser polish, th... See product details More

Revitalise System V2
Our colour-coded Revitalise System V2 is a collection of machine polishing compounds and pads to cover every level of paint correction from restoration to final refinement.
Designed to get professional results in the hands of any enthusiast, our three stages of compounds range from coarse cut Revitalise No:1 Restoring Compound and medium Revitalise No:2 Polishing Compound to fine Revitalise No:3 Refining Compound.

Pro Series Compounds
Our Pro Series Compounds and Machine Polishing Pads are the result of extensive development and testing over 3-years with independent professional detailers. For the ultimate finish our range includes our No.36 Heavy Cutting Compound, No.23 Medium Polishing Compound and our No.15 Fine Finishing Compound, along with Heavy, Medium and Fine Pro Series Machine Polishing Pads. See more on these in our article: The Auto Finesse Professional Series Range.
Polishing Away The Swirls Step-By-Step
While it goes without saying that you should always follow the instructions on your product of choice, we can generalise the process to some extent here. Once your vehicle is washed, decontaminated, dried and any areas at risk have been masked up, we can start to slay those swirls…

Step 1 - Test Your Compounds
First of all, always test a small area with your compound before attempting the rest of the car. In many cases a singe stage will be sufficient to eradicate swirls and refine to an acceptable stage. Others may take multiple stages, which is why we test to ensure we get the results we're after. That and because we don't want to cut away any of our paint unnecessarily.
Although many professionals can gauge the compound needed simply by looking, they'll still test. We always recommend starting with the finest compound and pad you have available to see if it has a sufficient level of cut and adjusting from there. Just remember that there's no point going straight in with the coarsest compound if it's not needed from a restoration standpoint. All you'll end up doing is wasting time and product having to refine the paintwork down to flawless afterwards.
And let's not forget that, despite appearances, most swirl marks are relatively fine defects to begin with.

Step 2 - Work Your Compound Right Through
Once you have your compound and pad of choice, it's time to get started… but don't make the mistake of trying to do the whole vehicle at once, or a large panel like a bonnet.
It's important that you work your compound all the way through, breaking down the abrasives until they stop cutting. This is how they work. To physically work any compound through you'll need to tackle and area of around 9 times the size of your pad (in a square) and perform each pass slowly - around an inch or so of movement a second is about right.
It's also important not to overdo it on the product, two or three pea sized amounts on a 5-inch pad is plenty to get you going for smaller pads, use a smaller amount of product.
As a basic guide, start your machine on a low speed on the vehicle to spread the product quickly over the area, before ramping up the speed for a few sets to fully work the compound through. When the residue turns clear, you can make one more slow pass on the a low speed.
To see how compounds and polishes work on a molecular level, check out our full guide: Car Polishes And Compounds Explained.

Step 3 - Remove The Residue Safely
Now it's a case of removing the residue with a fresh microfibre Work Cloth. For the best results it's always worth in investing in new short pile microfibre towels this job. Just to guarantee you don't end up putting any swirls back in.


Step 4 - Check The Results
A dedicated detailing lamp is and invaluable tool, not just for checking your handiwork, but for identifying the worst areas in the first place - you should never polish your car in direct sunlight after all. Our Swirl Spotter and Swirl Seeker Detailing Lights are engineered to emulate strong sunlight, which instantly highlights any imperfections. Always use a light to check before polishing, and one to check after.
When you're happy that no further cutting or refinement is needed, you can move on to polishing the next area until the car is complete. Only then is it time to add your chosen protection to look in your work and for yet more depth and gloss.


Next Steps...
And that's just about everything you need to know about cutting through swirl marks, refining your paintwork and maintaining the finish every time you wash. But, for more information on removing other defects, including the science behind different paint types and different polishers, along with some top tips to push your paint corrections to the next level, check out our article: The Basic Guide to Machine Polishing.
And for more top how-tos, be sure to swing by the Guides Section Of Our Blog.
Exterior Care
Exterior detailing is, let’s face it, the most in-depth collection of stages associated with the car detailing process. Understandably it’s also the heart of what we do here at Aut...


